Noise reduction
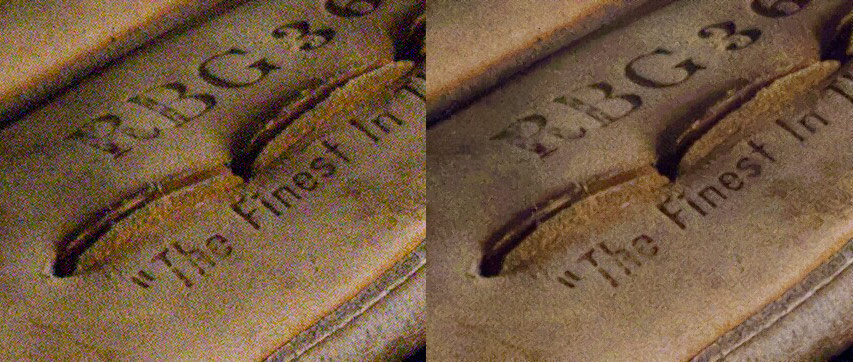
This function gives an advanced way to remove high ISO noise while keeping details. The texture based method removes the noise by the analysing of texture structures around a pixel and has great results in most instances. You can also choose to only remove the red-blue spots in chroma channels by selecting 'Clear color spots only'.

Jpeg Deblocking
This function is designed to remove jpeg Blocking Artifact by a pre-trained neural network. It runs similarly like the noise reduction function, but only targeting the artifact instead of all kinds of photo noise.
Smart erase
Select an unwanted object; use this magic function to make it disappear. No parameters needed. If unsatisfied, repeat selecting unsatisfied areas and running.

Defog
This function runs on an 'adaptive contrast' algorithm. It is used to enhance the photo which is foggy nonuniformly. The algorithm will analyse each pixel and , and set a contrast parameter to adjust it based on the contrast level around. It brings more natural results than the usual 'Unsharp mask' function.
It is useful to enhance large areas with low contrast, like clouds on sky. You may apply this function on a selected area too.
Enhance Dynamic Range
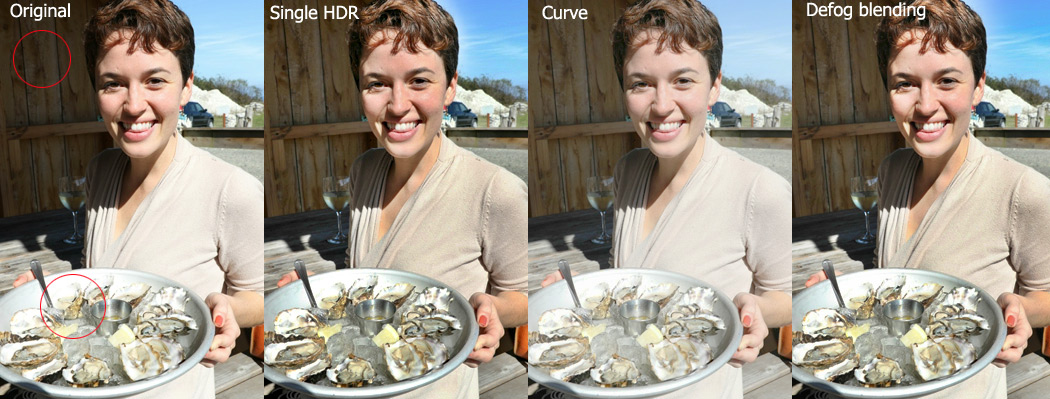
For high dynamic range scenes, where the photo has both overexposure and underexposure areas, this function can enhance the details in both by different methods.
The following figures compares the differences between 3 methods the program provides.

Remove Purple Fringing
This function is designed to remove/reduce the purple fringing effects from photos.
Scanner Descreening
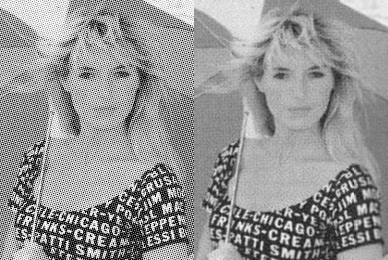
The array of dots used in the magazine halftone printing process is called a screen, and the software filter to remove it is called a Descreen filter.This function can remove noises with patterns, typically for images which are acquired from scanning of a printed matter.

Clean skin
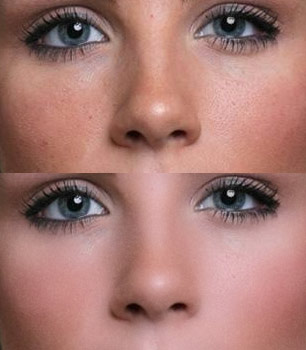
 This function helps cleaning wrinkles, blemishes and nevus on the skin of a portrait photo. It will only affect the skin area of the specified colour.
- More pink/More light: Adjust the skin colour to avoid yellow and dark.
- Skin clean: Remove small defects from the skin.
- Use noise reduction: An optional way of algorithm, more textures will be kept.
- Add fake texture: In case the result is too smooth, add fake textures to make it look natural.
To optimise a portrait, there are some more suggestions:
- Use 'repair' tool, also called 'Optimizing brush' in the menu, for big defects on skin.
- Use 'change shape' tool/brush to modify the shape of face and body or reduce fat.
- The 'Diffuse filter' is another common filter used on portrait photo with high-tone.
- Using 'sharpen' over the cleaned skin, on a selected area (the eyes), to emphasis the eyes
Advanced sharpen
A general sharpen function like an 'Un-sharp mask' will provide parameters to control the radius and amount, pulsing on a coarse threshold parameter to control the effects on the edge. Now in the Recomposit/Light Developer, the advanced sharpen function introduces a 'curve' to replace the 'threshold' for more precise controlling of the sharpened result.
The y-axis means the amount of sharpen. The x-axis of the curve is the value of edge. A big value of edge means an edge with big contrast. Click on preset, you can see some selection and from them know how it works.
For example, click 'Sharpen texture' from the presets. The curve only exists in the left, which means only small edges (texture) will be enhanced. The curve of the other presets covers all edges range meaning it works for enhancing all edges. There is still a difference in that the bigger edges get the smaller amount, which is set to avoid 'over-sharpen' on the sharp edges.
Lens blur
This function simulates the camera focusing effects.
- Radius: Size of maximal blurring mask.
- Highlight: Enhance highlight part.
- Aperture shape: Controls the shape of blurring mask.
- Depth mode: You can control the view depth with a simple model.
- Plain: blur all with the same radius.
- Tunnel: The scene is in a tunnel shape with near around and far in centre. You can click the preview to set the centre.
- Horizontal: Horizontal: The scene is in a landscape shape with near in bottom and far in top. You can click the preview to set the horizontal line.
- Focus at: Set the focusing point from near to far.
To get a better simulation, this function works with 'Inside/outside edge matting', which can cut objects and blurring only the background.
Style Menu and Image Degration
Instant filters
An instant filter is a combination of automation steps which adjusts photos globally to get special effects. The instant filter is just like a filter gallery that is quick to apply and easy to use. You can make your own scheme, and call them here, by saving the steps with the robot icon. See 'Workflow'-'Global adjusting then apply to other photos'. And the scheme file can be shared between computers.

